categories

Use Visual Clues to Improve Your Workflow

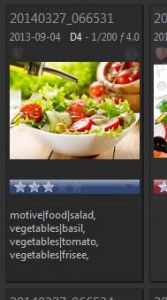
Visual Clues

The digital asset management system IMatch offers a range of visual clues which allow you to improve your workflow. These visual clues are shown in the File Window, the Keyword Panel and also in other views and panels.

Using visual clues effectively can save you a lot of time. You can find files faster, notice problems quicker and even judge metadata quality and consistency at a glance.

Using Colors to Highlight Folders

If you work with a large number of folders, you can use color-coding to make certain folders easier to identify. For example, you may use a special color to indicate folders which have been backed up or archived. Or you use different folder colors for different kind of files or topics.

Using colors in the Media & Folders View as visual clues.
Use colors to highlight folders or to group related folders by using the same or similar colors.

Color-coding for Categories

Using color-coding for categories allows you to highlight certain categories or entire category hierarchies by making child categories inherit the colors from their parent category.

In addition to the Category View and the Category Panel, you can configure IMatch show category colors in  File Window panels. This makes it easy to display file states, the hierarchies a file belongs to and many other things right in the file window, with easy to see color codes.

Using category color-coding to add visual clues to the File Window.
Color-coded categories and how these colors are displayed in the File Window. Click for a larger view.

In the example above, we have colored the entire FAMILY category hierarchy with orange. Every file assigned to one or more FAMILY categories thus displays an orange-colored segment in the File Window. Files assigned to the Children category hierarchy additionally get a light blue color.

We use an Archival State category to indicate which files have been backed up or archived. Color-coding this category allows us to see right in the File Window if a file needs to be backup up or has already been archived.

Which categories and colors you use is entirely up to you. The file window can display 8 to 20 unique category color segments per file, depending on how large you display the thumbnails.

Color-coding Keywords

IMatch 5 automatically mirrors keywords contained in your files in the special @Keywords category hierarchy. This not only makes it easier to work with keywords, but also enables IMatch to implement some special features.

When you color-code @Keyword categories, IMatch can (optionally) display these colors in the File Window and in the Keyword Panel. Whether you color-code the standard 5 W’s (WHAT, WHERE, WHO, WHEN, WHY) keywords or you color-code keywords by topic or even scientific or genealogical criteria, displaying keywords in colors makes it  easier to tell if keywords are missing or duplicated.

And if you need to assign many keywords to files (e.g., for stock photo usage), using colors-coding makes it easier to keep things in check.

Quality Control

This feature can also be utilized for quality control. For example, you require at least one  Motive, Location and Food keyword per image for your food stock collection.

If you configure each of these category hierarchies to use a different color, you are able to see with once glance at the Keyword Panel if keywords are missing or duplicated.

Color-codes in the Keyword Panel can serve as additional visual clues.
Using different colors for different types of keywords makes it easy to see if keywords are missing.

Label Colors

IMatch displays the color of the XMP label assigned to a file in the Rating and Label bar inside the File Window:

Associating colors with XML labels makes them even more useful.
A file with a blue XMP label and a 3 star rating in the File Window.

You can configure the colors associated with each XML label under Edit > Preferences > Metadata. This is especially useful if you work with multiple applications which use individual XML label names or colors.

For a better overview, you can customize a File Window Layout to apply the XML label color to the entire thumbnail panel background. Especially if you combine this with a compact thumbnail arrangement you can quickly get an overview over which labels have been assigned to how many files:

Using XML label colors for thumbnail backgrounds creates excellent visual clues.
Using the XML label color to color-code thumbnail panels in the File Window. Click for a larger view.

Summary

IMatch offers a variety or color-based visual clues which allow you to improve your workflow, to find files faster and even to check metadata quality at a glance.


Gaining Insight with the Data Map App

A digital image management system should not only allow you to manage and find your files, it should also be able to provide additional insight about your files and the metadata associated with these files.

Did you ever wonder which of your folders occupies the most disk space? Which lens and ISO settings you use most often? How many files you took per location? Or the 50 most often keywords and which files have them?

All these questions can be answered and visualized using the Data Map App shipped with the digital asset management system IMatch. To use this App, open an App Panel in IMatch via View > Panels > App Panel (keyboard shortcut: <F9>,<1>) and then select Data Map App from the drop-down list at the top.

The 50 Most Often Used Keywords

In the screen shot below we see the Data Map App showing the 50 most frequently used keywords in a database:

Gaining insight by visualizing the 50 most often used keywords in your database.
Visualizing the 50 most often used keywords in your database.

This visualization uses the @Keyword category hierarchy for input and then calculates how often each keyword is used. In the resulting visualization, each colored box represents one of your keywords. The size of the box indicates how often the keyword is used – the larger the box, the more often the keyword is used.

To see all files with one of these keywords, just click on the box. IMatch switches to the Category View and selects the corresponding @Keyword category.

Visualizing ISO Usage

Another of the sample presets allows you to see the most frequently used ISO setting. The Top 50 ISO visualization is based on the a data-driven ISO sample category that is automatically created for new databases. By clicking any of the colored boxes you can open the corresponding category to see all images taken at that ISO setting.

Visualizing the most often used ISO settings for your images.

The Data Map App ships with a number of other pre-built visualizations, e.g., Top 50 folders (great to see what your largest folders are), lens usage statistics, the 50 top locations (based on the number of images taken) etc.

Extending IMatch with Apps

While being useful all by itself, the key point in the Data Map sample App is to demonstrate how you can extend IMatch with custom Apps. The unique IMatch 5 App technology makes it easy to add custom functionality to IMatch using only HTML and JavaScript.

This Data Map App uses the renowned open source D3JS visualization framework and combines it with a bit of custom JavaScript which loads data from an IMatch database and transforms it so it can be used as input by D3JS. Much more can be done with D3Js, check out their web site for examples.

Using an IMatch App written in HTML and JavaScript allows you not only to create your own Apps, but also to utilize all the awesome JavaScript libraries available today. These cover all kinds of topics: visualization, animated time lines, multimedia, presentation, slide shows, animations and much, much more.

If you know a bit about HTML and JavaScript (or you always wanted to learn these key technologies which drive the Internet) IMatch Apps are a useful and fun way to use these technologies.

Migrating XMP Rating and Label from IMatch 3 to IMatch 5 without processing pending updates…

In order to import XMP metadata into your IMatch 5 database, the XMP data has to exist in the image file or a corresponding sidecar file. IMatch 5 cannot import XMP metadata directly from the IMatch 3 database for technical reasons.

If you have never written back XMP metadata to your image files in IMatch 3, you may be faced with tens of thousands of files which have no up-to-date XMP metadata. Updating the XMP in all these files can take a very long time.

Note: This only affects XMP metadata. When you have updated classic IPTC or EXIF data in IMatch 3, this data has been written to the image file immediately and is thus always up-to-date.

The Trick

If the only XMP data you have used/updated in IMatch 3 are ratings and labels, you can use a trick to avoid having to write XMP data to all your files before importing them into IMatch 5.

You perform the trick before you migrate your existing IMatch 3 database into IMatch 5 with the Database Converter. The trick consists of three easy steps:

  1. Create a data-driven category for Rating and Label in.
    This step creates one category for each rating and label you have used and assigns the corresponding files to that category.
  2. Convert the data-driven categories into regular categories.
    This ensures that IMatch 5 imports the rating and label categories automatically.
  3. In IMatch 5, assign ratings and labels using these categories.

1. Create Data-driven Categories

Switch to the Category View in IMatch 3.
Select the @All category and press <Ins> to create a new child category. Name it Rating. Repeat these steps and create a category named Label:

Rating and Label Categories

Right-click on Label and choose Properties. In the Properties dialog box, enable the Auto-group images based on… option and either select the XMP field

http://ns.adobe.com/xap/1.0/xap:Label

from the drop-down list or use copy/paste to transfer the name from above:

Data-driven properties

Click OK to close the dialog box and answer Yes when asked whether you want to create the category. After a short time, IMatch has finished creating the data-driven category Label:

Label Category

For each label used in your database, IMatch has created one child category under Label. Each child category contains all files with that label.

Repeat these steps for the Rating category: Select the Rating category, right-click and choose Properties. In the dialog, enable the option to Auto-group images based on… and select the following XMP field from the drop-down list:

http://ns.adobe.com/xap/1.0/xap:Rating

or copy it from above. Press OK to close the dialog and then answer the prompt with Yes. IMatch creates child categories for each rating used in your database and assigns all files with that rating:

Rating Category

2. Convert the Data-driven Categories Into Regular Categories

Select the @All category and press <Ins> to create a new category. Name it Rating and Label.

Select the Rating category created above. Left-click and drag it to the Rating and Label category. Release the mouse button. In the dialog, set the options as follows:

Category Options

Click OK. IMatch now creates a copy of the entire Rating category (with child categories) under the Rating and Label category. The copy is a normal category, not a data-driven category – and this is exactly what we want.

Repeat these steps for the data-driven Label category. The end result will look similar to this:

The final rating and label category

3. Migrate Your Database

Close IMatch 3 and run the IMatch 5 Database Converter to convert your database. Follow the instructions in the Database Converter help for a quick and smooth transfer.

IMatch 5 automatically imports the Rating and Label category you have created. This transfers the information which files should have which rating and label from IMatch 3 to IMatch 5. And that’s the trick.

4. (Re-)Assign Ratings and Labels

Open your new database in IMatch 5. Switch to the Category View to see all categories imported from your IMatch 3 database. The Rating and Label category will be there:

Categories in IMatch 5

Now start assigning ratings and labels:

Note: For the following steps, you should disable background write-back under Edit > Preferences > Background Processing if you have it enabled. This way IMatch only updates the database but does not automatically write-back data to the files on disk. This improves the performance during the following procedure.


Select the Green category under Rating and Label > Label. This shows you all files which had a Green label assigned in IMatch 3 in the File Window.

Select all files in the File Window with <Ctrl>+<A>. Right-click to open the context menu and choose Green to assign all files a Green XMP label:

Assigning a Green Label

IMatch writes the Green label into the XMP record of each file and marks the files as pending because the metadata was changed. Repeat these steps for each Label and Rating category under Rating and Label. Then delete the Rating and Label category, it is no longer needed.

This trick takes quite a lot of text to explain, but in fact takes only a few minutes to execute. Much faster than writing back XMP data to thousands or even tens of thousands of files just to get the rating and label information imported into IMatch 5.