Exporting Metadata and Attributes with the Text Exporter
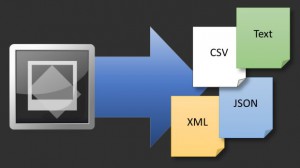
Exporting Metadata and Attributes with the Text Exporter Exporting metadata in multiple formats is a core feature of any digital asset management system. IMatch includes a range of export modules that let you export metadata, attributes, and other database content in several widely used formats. Exporting Metadata and Attributes This article covers the flexible Text […]
Exporting Metadata and Attributes with the Text Exporter Read More »